Visual voicemail is an idea that’s been around for a long time, but most people are still using archaic dial-in systems. One problem is that carrier and handset support for the feature is uncommon, and another is that it usually has an associated cost.
So lets devise that plan that nets you visual voicemail that works on any handset, most carriers and doesn’t cost you anything extra. For this to work you’ll need data and push email accounton your phone. You’re plan must also support conditional call forwarding. And finally we’ll need an account at freephoneline.ca (where the real magic happens here).
 The first thing you should do is setup your account at Free Phone Line. These guys offer a free Canadian phone number, voicemail, long distance and more. Follow the instructions and make sure you choose a local number. Once your account is created and verified, we can start to setup the voicemail. The first thing you might want to do is record your voicemail greeting. Download and open the FPL softphone app on your computer, dial *98 (or click the voicemail button) and follow instructions to record your greeting.
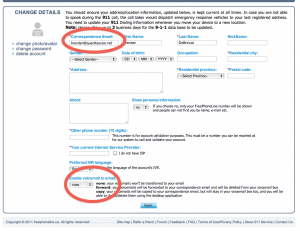
Now you should configure the system to email the voicemails to you. On the FPL website, make sure you’re logged in and click on the Change Details page. Set the “Correspondence Email” to your push email account, and at the bottom of the page set “Enable voicemail to email” to copy or forward. Copy will email your voicemails to you and keep a copy on the FPL server (so you could dial in and check if you wanted) and forward will simply email you the voicemails and then delete them from the FPL system. Click save.
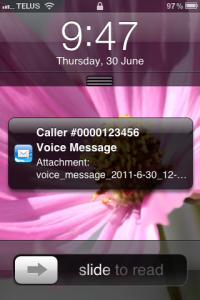
Test what we have so far. Call your FPL number, leave a voicemail and make sure it gets pushed to your phone.
OK, now for the tricky part. Get your mobile and dial these three sequences to connect your phone to the FPL voicemail:
- Dial *67*[FPL phone number]# and SEND “Call forward if busy”
- Dial *61*[FPL phone number]# and SEND “Call forward if not answered”
- Dial *62*[FPL phone number]# and SEND “Call forward if unreachable”
Now your phone should be setup with the FPL voicemail system. Test the system in three different ways to make sure all missed calls go to your new voicemail. Call your phone and let it ring until it goes to voicemail, call your phone and ignore the call by pressing the end or sleep keys, and call your phone while its completely turned off or in airplane mode.
If all of these tests send you to the right mailbox, and all your VMs are pushed to your phone then you’re all done! Another benefit is that you’ll be able to access your voicemail from any device that has your email account.
Notes
- Some email providers may accidentally mark your voicemails as spam. Test your setup, and if you have trouble receiving your voicemails at your correspondence email try checking the junk folder.
- If you are with Rogers / Fido and have a voicemail package you might have trouble with the conditional call forwarding setup. It may be necessary to disable voicemail or remove your voicemail feature completely.
- Depending your plan minutes may be deducted from your monthly bucket. Also, if you’re roaming you may be charged a roaming minute for each time someone hits your voicemail. I suggest never roaming with your Canadian SIM and buying local SIMs instead.
Header photo by Emrah Ömüriş.

